
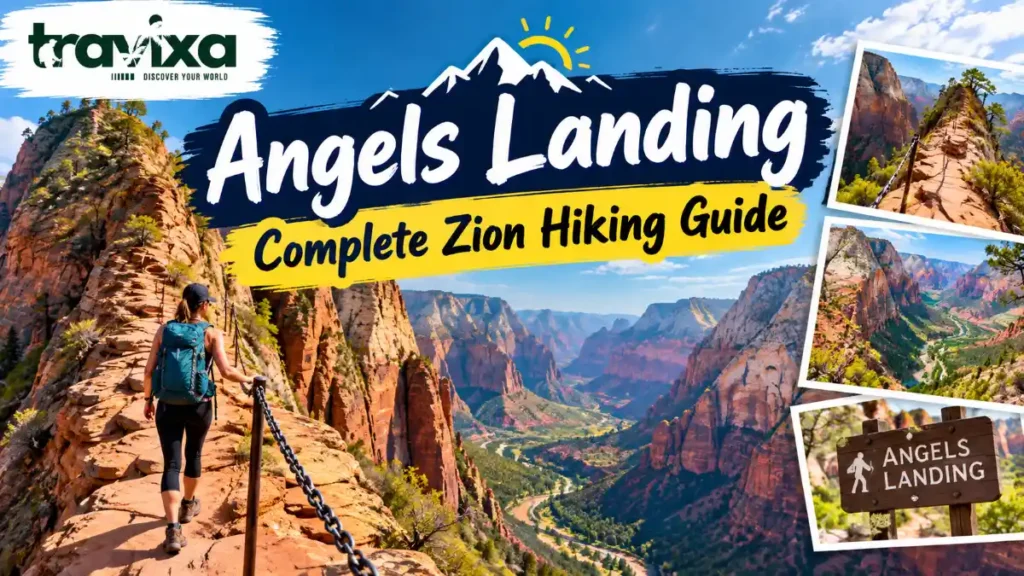

Angels Landing is one of the most famous and thrilling hikes in Zion National Park. Located in southern Utah, the trail is known for its steep sandstone cliffs, narrow ridges, dramatic canyon views, and the famous chain section that leads hikers toward the summit.
The hike is not an easy walk in the park. It is physically demanding and includes exposed sections with steep drop-offs. The final part of the trail uses fixed chains as handholds, making the experience exciting but also requiring careful movement and a good head for heights.
Because of the trail’s popularity and narrow sections, the National Park Service requires a permit for everyone hiking to Angels Landing. The current permit system uses both a seasonal lottery and a day-before lottery.
If you are planning to hike Angels Landing, this guide explains the route, difficulty, permits, safety, transportation, best time to visit, what to bring, and what you can expect along the way.
Angels Landing Quick Facts
| Detail | Information |
|---|---|
| Location | Zion National Park, Utah |
| Trailhead | The Grotto, Shuttle Stop #6 |
| Round-Trip Distance | About 5.4 miles (8.7 km) |
| Elevation Gain | About 1,488 feet (454 m) |
| Typical Hiking Time | Around 4 hours |
| Difficulty | Strenuous |
| Highest Point | About 5,790 feet (1,765 m) |
| Permit | Required for Angels Landing |
| Permit Cost | $6 application fee + $3 per person if selected |
| Best Seasons | Spring, fall, and suitable summer days |
| Main Challenge | Steep, exposed chain section |
| Dogs | Not allowed on the trail |
The National Park Service currently describes the full hike as approximately 5.4 miles round trip with about 1,488 feet of elevation gain, although hiking times vary depending on fitness, crowds, weather, and how long you spend at viewpoints.
What Makes Angels Landing So Special?
There are plenty of beautiful hikes in Utah, but Angels Landing has a combination that is difficult to find anywhere else.
The trail climbs through Zion Canyon and eventually reaches a narrow sandstone ridge high above the canyon floor. As you climb, the views become increasingly dramatic.
The final section is the part that makes the hike famous. Hikers use fixed chains installed along sections of the narrow ridge to help with balance and stability. Some areas are less than three feet wide and have steep drop-offs on either side.
That combination of exposure, elevation, and incredible scenery gives Angels Landing its reputation as one of the most adventurous hikes in Zion.
However, you should not treat the chain section like a tourist attraction. It requires concentration, patience, and careful footwork.
Angels Landing Hike: What to Expect
The trail begins near the Virgin River at The Grotto and follows the West Rim Trail toward Scout Lookout. Along the way, you will encounter several distinct sections.
Understanding each section before you start makes the hike much easier to plan.
1. The First Switchbacks
The hike begins at The Grotto, where you cross the bridge over the Virgin River and start climbing.
The first section follows a paved and well-established path before the elevation starts increasing through a series of switchbacks.
This part of the hike can feel difficult because you gain elevation steadily while being exposed to the sun.
The good news is that the path is relatively wide, and you can gradually settle into your hiking pace.
As you climb, the views of Zion Canyon begin opening up behind you. Looking back occasionally is worth it because the scenery changes quickly as you gain elevation.
2. Refrigerator Canyon
After the initial climb, the trail enters Refrigerator Canyon.
The canyon gets its name from its cooler conditions compared with the exposed sections of the trail. This is one of the more comfortable parts of the hike because you get a break from direct sunlight.
The trail also becomes less demanding for a short period, giving you a chance to slow down, drink some water, and recover before the next major climb.
Enjoy this section because the harder climbing is coming soon.
3. Walter’s Wiggles
Next comes one of the most recognizable parts of the Angels Landing route: Walter’s Wiggles.
These are a series of tight switchbacks that climb steeply toward Scout Lookout. There are 21 switchbacks, and although this section is relatively short, it can be tiring because of the continuous elevation gain.
Take your time here rather than trying to rush.
There is no prize for reaching the top of the switchbacks first, and saving some energy is important because the most exposed part of the hike is still ahead.
4. Scout Lookout
After Walter’s Wiggles, you reach Scout Lookout.
This is an important point on the hike because it gives you a chance to stop and decide whether continuing to Angels Landing is right for you.
The views from Scout Lookout are already impressive, and you do not need an Angels Landing permit to hike to Scout Lookout. The National Park Service specifically allows visitors to reach Scout Lookout without a permit.
If someone in your group is uncomfortable with heights, not confident on steep terrain, or simply does not want to continue, Scout Lookout can be a good turnaround point.
Beyond this point, the character of the hike changes significantly.
5. The Angels Landing Chain Section
This is the part everyone talks about.
From Scout Lookout, the trail becomes narrower and much more exposed. Metal chains are installed along sections of the route to provide hand support while hikers move across the sandstone ridge.
Some parts of the trail are surprisingly narrow, and hikers travel in both directions. Because there is limited space, you may need to wait for other hikers or carefully pass them.
Move slowly and stay focused.
Keep at least one hand on the chain whenever the terrain requires it. Do not rush simply because another hiker is behind you.
The chains are there to assist with stability, but they do not eliminate the risk of falling. You still need to maintain your footing and stay aware of the terrain.
The National Park Service warns that the trail contains steep drop-offs and that wet or icy rock can become particularly dangerous.
Important Safety Rule
If the weather becomes bad, do not continue simply because you already have a permit.
Rain can make sandstone extremely slippery, while thunderstorms create additional danger around exposed ridges. The NPS advises hikers not to ascend when storm clouds are nearby or when the ground is wet or icy.
6. Reaching the Summit of Angels Landing
After carefully working through the chain section, you eventually reach the top of Angels Landing.
The feeling at the summit is hard to describe.
You can look in almost every direction across Zion Canyon and see massive sandstone cliffs rising around you. The trail you just climbed looks incredibly small from above.
The summit provides one of the most famous viewpoints in Zion National Park.
But reaching the top does not mean you can stop thinking about safety.
There are still exposed edges and steep drop-offs. Stay away from unstable edges, avoid climbing onto rocks simply for a photograph, and keep an eye on your footing.
A great photograph is never worth taking an unnecessary risk.
How Long Does Angels Landing Take?
Most hikers should plan for approximately four hours for the round trip, although the National Park Service notes that some people take longer. The exact time depends on fitness, trail traffic, weather, and how much time you spend at Scout Lookout and the summit.
A rough breakdown might look like this:
- Trailhead to Refrigerator Canyon: steady uphill walking
- Refrigerator Canyon to Walter’s Wiggles: moderate climb
- Walter’s Wiggles to Scout Lookout: strenuous
- Scout Lookout to summit: slow, technical, exposed hiking
- Summit to trailhead: careful descent
The descent can sometimes feel more difficult than the climb because you have to manage the steep terrain while looking down the slope.
Give yourself plenty of time and make sure you can return before dark.
How Difficult Is Angels Landing?
Angels Landing is considered a strenuous hike.
The physical elevation gain is significant, but the biggest challenge for many hikers is the exposure on the final section.
You should be comfortable with:
- Steep uphill hiking
- Uneven and rocky terrain
- Narrow trails
- Heights and exposed cliffs
- Using fixed chains for support
- Hiking for several hours
- Descending steep terrain
This is not a trail I would recommend to someone who is extremely uncomfortable with heights or struggles with balance.
The National Park Service also advises against attempting the exposed section if you have a fear of heights, if conditions are wet or icy, or if darkness could arrive before you finish.
Is Angels Landing Safe?
Angels Landing can be completed safely by many experienced and prepared hikers, but it should never be treated as an ordinary hiking trail.
The exposed sections have serious fall hazards, and conditions can change quickly.
Your safety depends heavily on your decisions. Good footwear, enough water, appropriate weather, patience around other hikers, and careful movement all matter.
Keep these safety tips in mind:
Stay on the designated trail. Do not climb onto unstable rocks or venture toward cliff edges for photographs.
Use the chains properly. When the trail is exposed, maintain a secure grip and move deliberately.
Watch the weather. Rain, ice, and thunderstorms can make the trail significantly more dangerous.
Start early. Cooler temperatures and fewer crowds can make the experience more comfortable.
Do not rush. Take breaks when needed and allow other hikers to move safely.
Know when to turn around. Having a permit does not mean you have to reach the summit.
Angels Landing Deaths and Risk
Angels Landing has experienced fatal falls over the years, which is one reason the National Park Service emphasizes careful preparation and responsible hiking.
Rather than focusing on a specific death count that can change with time and reporting, it is more important to understand that the trail contains genuine fall hazards.
The NPS says the trail has sections with steep drop-offs and that its safety guidance is designed to help visitors reduce the risks involved.
The permit program was introduced partly because congestion on the narrow, exposed trail created safety concerns. According to the NPS, the program has improved trail conditions and hiker safety.
Angels Landing Permit: Do You Need One?
Yes.
As of 2026, everyone hiking to Angels Landing needs a permit. This includes the portion beyond Scout Lookout and the chain section.
You do not need an Angels Landing permit to hike to Scout Lookout.
The permit program was introduced in 2022 to reduce congestion and improve safety on the narrow upper section of the trail.
Permits are distributed through two main systems:
- Seasonal Lottery
- Day-Before Lottery
How the Angels Landing Seasonal Lottery Works
The seasonal lottery allows visitors to apply in advance for hikes during specific periods.
For 2026, the NPS schedule is:
| Hiking Dates | Lottery Opens | Lottery Closes | Permits Issued |
|---|---|---|---|
| March 1 – May 31 | February 13 | February 25 | February 26 |
| June 1 – August 31 | April 1 | April 20 | April 25 |
| September 1 – November 30 | July 1 | July 20 | July 25 |
| December 1 – February 28, 2027 | October 1 | October 20 | October 25 |
Applicants can select multiple preferred dates and times in their application.
Because these dates are updated by the National Park Service, always check the official NPS page before planning your trip.
Angels Landing Day-Before Lottery
If you did not receive a permit through the seasonal lottery, you still have another option.
The day-before lottery opens every day at 12:01 a.m. Mountain Time and closes at 3 p.m. Mountain Time on the day before your planned hike.
For example, if you want to hike on Saturday, you can apply on Friday between 12:01 a.m. and 3 p.m. Mountain Time. The NPS announces the lottery result around 4 p.m.
This option is particularly useful for travelers whose plans are flexible.
How Much Does an Angels Landing Permit Cost?
The current permit system has two fees.
- $6 application fee for the lottery
- $3 per person if your permit application is successful
The $6 application fee covers an application for a group of up to six people and is non-refundable.
If you receive a permit through the seasonal lottery, the $3 per-person fee can be refunded if you cancel at least two days before your hike, subject to the NPS rules. Day-before lottery fees are non-refundable.
Can You Hike Angels Landing Without a Permit?
You can hike to Scout Lookout without a permit, but you cannot continue beyond Scout Lookout to Angels Landing without one.
Rangers may check permits at different points along the route. The NPS advises hikers to download or print their permit confirmation before starting because cell service can be unreliable.
Do not try to bypass the permit system.
If you do not get a permit, Scout Lookout is still a worthwhile destination, and the West Rim Trail offers additional hiking opportunities.
Where Is Angels Landing?
Angels Landing is located inside Zion National Park in southwestern Utah.
The nearest town is Springdale, which sits directly outside the park’s southern entrance.
Zion is within driving distance of several popular Southwest destinations, making it easy to include in a larger road trip.
Approximate driving times can vary depending on traffic and road conditions, but Zion is roughly:
- 2.5 to 3 hours from Las Vegas
- 4.5 to 5 hours from Salt Lake City
- Within a larger Utah national park road-trip route
Always check current road conditions before driving because weather, construction, rockfall, or seasonal restrictions can affect travel.
Angels Landing Trailhead: How to Get There
The standard starting point for Angels Landing is The Grotto, Shuttle Stop #6.
During the main shuttle season, personal vehicles are not allowed on the Zion Canyon Scenic Drive. Visitors normally park near the Zion Canyon Visitor Center or in Springdale and use the shuttle system.
From The Grotto, cross the road and bridge, then follow the West Rim Trail toward Scout Lookout.
The 2026 Zion Canyon shuttle is free, and you do not need a separate ticket or reservation to ride it. Shuttle schedules change seasonally, so check the current NPS schedule before your hike.
Important
Your Angels Landing permit has a start time associated with it. The NPS says the start time on your permit is the time you need to be at The Grotto, so allow enough time to park, enter the park, catch the shuttle, and reach Stop #6.
Zion National Park Entrance Fee
The Angels Landing permit is separate from the park entrance fee.
For 2026, a standard private vehicle pass for Zion National Park costs $35 and is valid for 1–7 days. Other pass options are available, including the America the Beautiful annual pass.
The National Park Service also currently lists an additional nonresident fee for non-U.S. residents aged 16 and older unless they enter with an eligible Annual or America the Beautiful Pass. Check the official NPS fee page for the latest rules before traveling.
What Should You Bring to Angels Landing?
Packing properly can make a big difference on this hike.
Good Hiking Shoes
Wear hiking shoes or boots with reliable traction. Avoid sandals and casual shoes, especially because the sandstone can become slippery.
Plenty of Water
Angels Landing is physically demanding and much of the route is exposed to the sun.
The NPS recommends that visitors drink plenty of water and notes that water is available at The Grotto, but there is no drinkable water along the trail itself.
Food and Snacks
Bring enough food to keep your energy up. Lightweight snacks such as energy bars, nuts, fruit, or sandwiches are convenient.
Sun Protection
Pack:
- Sunscreen
- Hat
- Sunglasses
- Lightweight sun-protective clothing
Small Backpack
A comfortable daypack is enough for most hikers. Avoid carrying unnecessary weight because the chain section requires balance and controlled movement.
Phone or Camera
The views are spectacular, so you will probably want photographs. Just make sure photography never distracts you from the trail.
Permit Confirmation
Download or print your permit before arriving at the trailhead. Cell service may be unreliable, and rangers can ask to see the permit.
Headlamp
A small headlamp is a smart backup, particularly if there is any possibility that you could finish later than planned.
Best Time to Hike Angels Landing
Spring and fall are generally excellent times to explore Zion because temperatures can be more comfortable than during the hottest part of summer.
Summer can be very hot, particularly during the middle of the day. Starting early can help you avoid the strongest heat and some of the busiest periods.
Winter can also offer beautiful scenery, but snow and ice can create serious hazards on exposed sandstone.
The National Park Service specifically warns that wet or icy ground can be dangerous, and thunderstorms can also make the exposed sections hazardous.
Best Time of Day
An early start is usually a smart choice.
Starting early can mean:
- Cooler temperatures
- Less intense sunlight
- More comfortable hiking
- Potentially less congestion
- More time to finish before evening
However, your permit start time determines when you can begin the permitted portion of the hike, so plan around the time shown on your permit.
Is Angels Landing Open All Year?
Angels Landing is listed by the National Park Service as a year-round hiking activity, but actual access can be affected by weather, trail conditions, maintenance, or temporary closures.
Before leaving for your hike, check the current Zion National Park conditions page.
Do not assume that having a permit guarantees that conditions will be suitable for hiking.
Angels Landing vs. Scout Lookout
If you are not comfortable with heights, you do not necessarily have to skip this area of Zion.
You can hike to Scout Lookout without an Angels Landing permit.
The route to Scout Lookout still provides impressive views and includes much of the elevation gain of the full hike. The NPS specifically notes that Scout Lookout can be a reasonable stopping point for people who do not want to continue onto the exposed chain section.
This can also be a good solution for groups where some people want to continue to Angels Landing while others prefer a less exposed experience.
What If You Don’t Get an Angels Landing Permit?
Do not worry if you miss the seasonal lottery.
You can try the day-before lottery through Recreation.gov.
If you still do not get a permit, you have several alternatives:
Hike to Scout Lookout
This is the easiest option if you still want to experience the Angels Landing route.
Explore the West Rim Trail
The West Rim Trail continues beyond Scout Lookout and provides additional Zion scenery without requiring an Angels Landing permit for that section.
Try Another Zion Hike
Zion has many other spectacular hiking routes. You can choose another trail based on your fitness level, available time, and weather conditions.
The important thing is not to attempt the chain section without the required permit.
Angels Landing Photography Tips
Angels Landing is one of the most photogenic hikes in Zion.
The canyon views become more dramatic as you climb, while the summit provides a wide panorama of the surrounding landscape.
For better photographs:
- Start early for softer light.
- Photograph the canyon from different elevations.
- Use a wide-angle lens if you have one.
- Keep your camera or phone secure.
- Never step onto an unsafe edge for a photograph.
- Let other hikers pass before stopping for pictures in narrow sections.
The best photograph is one you can safely take.
Angels Landing Hiking Tips for First-Time Visitors
If this is your first visit to Zion, a little preparation goes a long way.
Check the permit requirements first. Do not build your entire itinerary around Angels Landing until you understand the current lottery system.
Arrive early. Give yourself enough time for parking, entrance procedures, and the shuttle.
Bring enough water. There is no drinkable water along the trail after The Grotto.
Wear proper footwear. Good traction is much more important than fashionable hiking shoes.
Watch the weather. If the rocks are wet or icy, reconsider the hike.
Do not rush the chain section. Move at a comfortable pace and allow other hikers to pass when safe.
Respect the environment. Carry your trash out and stay on designated trails.
Know your limits. Turning around is not failure. Zion will still be there for another trip.
FAQs About Angels Landing
Q1. How hard is Angels Landing?
Angels Landing is a strenuous hike. The elevation gain is significant, and the final section includes narrow, exposed terrain with fixed chains. Fitness is important, but comfort with heights and careful movement are equally important.
Q2. How long is Angels Landing?
The current National Park Service information lists the full round-trip hike at about 5.4 miles, with approximately 1,488 feet of elevation gain. Many hikers take around four hours, although the time can be longer.
Q3. Do I need a permit for Angels Landing?
Yes. As of 2026, everyone hiking to Angels Landing needs a permit. You do not need a permit to hike to Scout Lookout.
Q4. How much does the Angels Landing permit cost?
The lottery application costs $6, covering an application for up to six people. If you receive a permit, the fee is $3 per person.
Final Thoughts
Angels Landing is more than just a difficult hike. It is an experience that combines physical effort, dramatic scenery, and one of the most recognizable mountain routes in Zion National Park.
The hike begins relatively gently before becoming progressively steeper and more exposed. By the time you reach the chains, you should be prepared to slow down, focus on every step, and respect the environment around you.
The permit system has changed how visitors experience the trail, but it also helps manage congestion on the narrowest sections. In 2026, you can apply through either the seasonal lottery or the day-before lottery, while Scout Lookout remains accessible without an Angels Landing permit.
If you decide to take on the hike, prepare properly, check the weather, bring enough water, wear shoes with good traction, and never take unnecessary risks for a photograph.